[This is a guided explanation of how to get started with Canvas for faculty members who have been making minimal use of Canvas so far. The following pages detail how to set up a very basic site, and once you have done this confidently you will be ready to take any next steps you wish to take.]
Use Assignments to receive work from your students. In the easy scenario we have been working with, you wrote a letter as a “page”, included an essay assignment as a “file”, and now will set up an “assignment” to receive submissions from your students.
To add an assignment, follow the same procedure as you did when you created a page or uploaded a file. Some faculty members who have been using the grade book may have already created assignments. If so, then, rather than adding a new assignment, they will select the assignment from the “Add” menu so that a link to the assignment appears in the module.
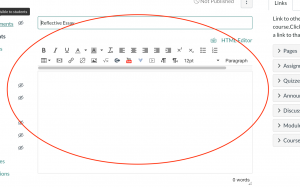
As with the page you created, you will need to now go in and edit the assignment. You will see that there are many settings and features of assignments that you can use. This page will walk you through the basic settings that you will need to use in order for you to use the assignment effectively.
- Add instructions for students. You have the instructions in the letter and in the file, but it is best to repeat them here. Write a summary of the assignment, or direct students back to an element where the assignment is detailed for them.
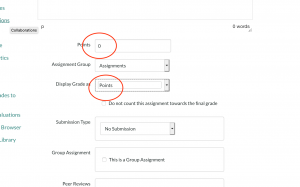
2. Set the grade values for the assignment. You will need to set how much course credit the assignment is “worth” and how you will measure it. At a future time you will set up the grade book to work with these assignments, but for now, it is probably best to set the assignment to be worth 100 points and count the credit in points in the drop down box below that. You can, of course, experiment with different measurements.
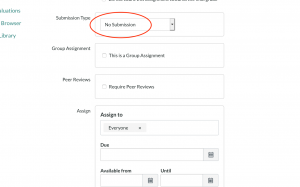
3. Set the submission type. Your goal is to receive work from students online. So you will need to set the “Submission Type” for “Online.” When that box opens, you have several options; most faculty will select “File Uploads.” This will allow your students to upload a file for you to read.

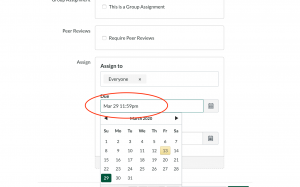
4. Set the due date. You should set the assignment due date to the date you have communicated to students. To do this, scroll to the bottom of the page. The box will read that the assignment is assigned to “everyone.” Leave this as it is. Then click on the calendar to select the due date. This date will appear to students in a variety of places on the site, including their calendar, and it will also appear for you in the grade book in the event that students submit their work late. When you are finished, save the assignment.
When you are ready to grade the assignments, you will use the speed grader. We will cover this in another page.
Next step: Make your site available to students.