by Gillian Galle
When I last wrote about this, we were all feeling the crush of a pandemic and learning several new technologies all at once. We necessarily had to prioritize learning some skills over others and it’s very possible that Aviso took a bit of a backseat. Although things certainly aren’t “back to normal,” you may find yourself with a little more breathing space these days and decide it’s time to try out a new thing!
How to Allow Your Students to Schedule an Advising Meeting in Aviso
Step 1: Log into Aviso. Once your Dashboard has loaded, you’re going to the top right of the Aviso screen and clicking on your icon:

Step 2: Clicking on the “Settings” option in the drop down menu that appeared brings you to a long list of different settings for your account. You’re going to scroll all the way down to:

It’s approximately the 8th option down… Once you find it, you’ll want to click the checkbox next to “Accept scheduled meetings from students” which will cause this section to expand!
Step 3: Let’s look at a few of the options that have now appeared.

- The Lead Time allows you to restrict how far in advance the student needs to make the meeting request. Depending on your advising style, you may only need 30 minutes, 1 hour, or more!
- Notice the message highlighted in sea foam green; this is synced up with your Outlook calendar, so if you’re keeping all of your meetings/classes/appointments up to date in that calendar Aviso won’t let a student schedule their meeting during one of those claimed times.
Pretty cool, right? Well, in order for your student to actually meet with you, you’ll need to add a location for that meeting. So go click on the blue button marked “+Add”
Step 4: You’ll have a new window pop up:

And you’ll want to open the drop down menu. Now, be forewarned: A very, very, very long list appears. It will take some scrolling, but about three quarters of the way down you’ll find a section that looks like:

At the time we first published this, COVID was forcing all of us into online/remote meetings. Nowadays, you may want to only hold meetings in person in your office (CU Campus – CU Faculty/Advisor Office) or perhaps you’d like to hold some in hours person and other hours online (CU Campus – CU Faculty/Advisor Remote). Whether you choose the Office or Remote option, a nearly identical window opens:

Looking beneath the sea foam green highlighting, a bar of days and times has shown up.
Before we set those though, I want to draw your attention to the “Services” listed just below the days and times. You can select the services you want to “offer” for your meetings. Think of this as a way for the student to indicate what they want to accomplish during their meeting with you! Select all the options you want your student to be able to choose from.
Step 5: Let’s set some times! The way I’ve approached this is I’m typically willing to meet Monday through Friday, anytime between 9:00 am – 5:00 pm, as long as I don’t already have a meeting scheduled on my work calendar. If you have different days and times you use, go for it! To add a time, click in the “Start” box and the “End” box and a little menu pops up: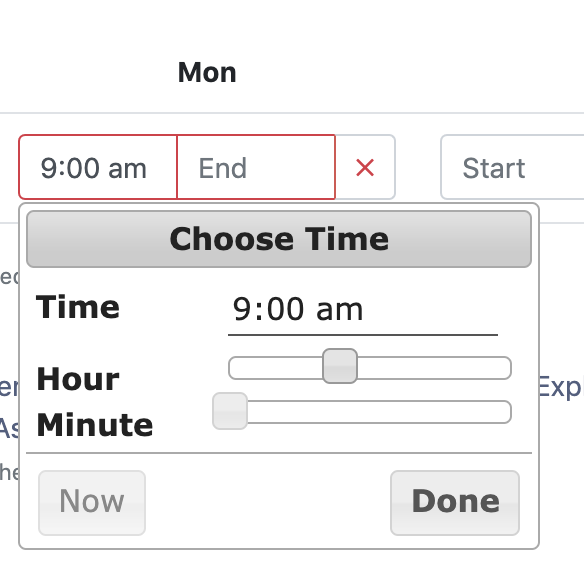
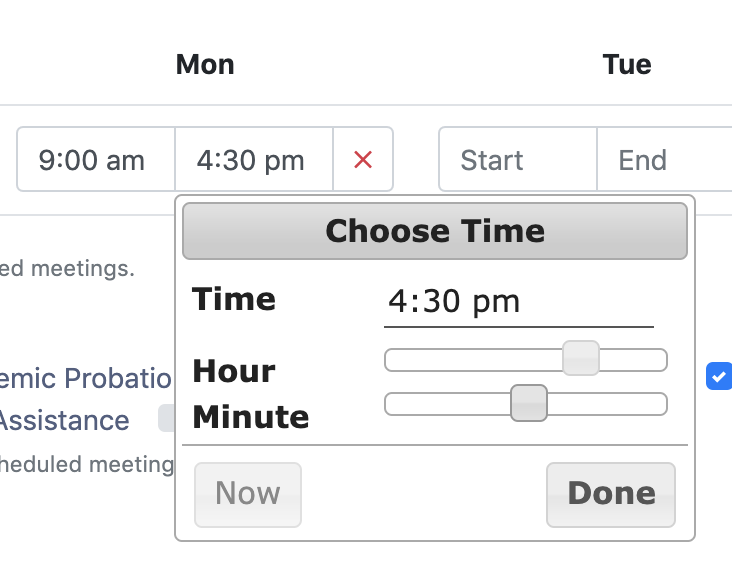
Or, if you want to skip lunchtime, like in the example below, click the blue “+Add Row” button (in the header to the right of the location) to add a row!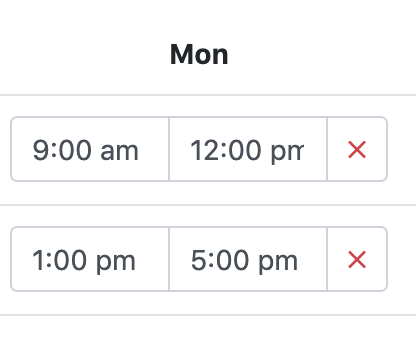
What if you want to offer a combination of face to face and remote office hours?
Since these are considered two different “locations” you’ll go back to the original blue “+Add” button located to the right of the Meeting Locations section header (See Step 3 above) to add whichever location you haven’t posted yet. You’ll then repeat Steps 4 and 5 to add days and times of availability.
Note: Aviso won’t allow you to overlap availability. That is, you can’t offer the same hour of help in both the Remote location and the Office location.
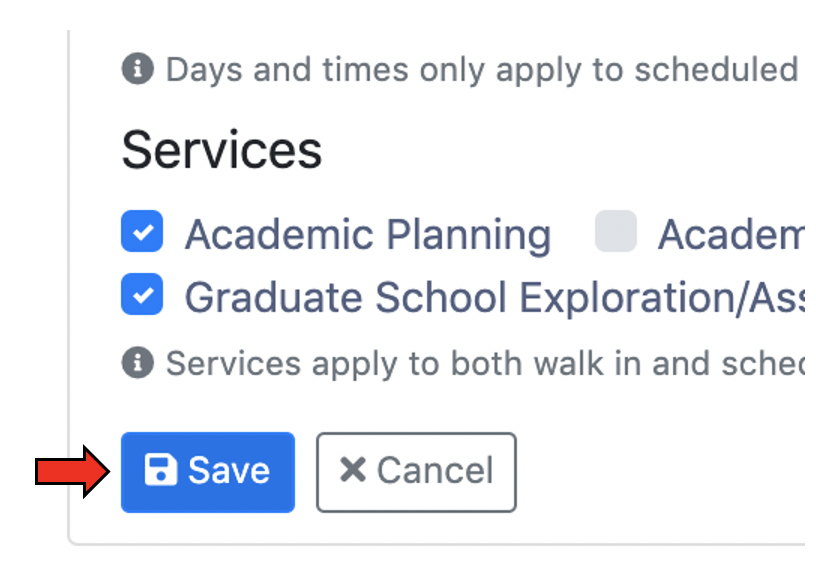
Step 6: Once you’ve added times to the days you want to be available (if you don’t want to be available on a particular day of the week? Just don’t add times!), don’t forget to do the most important thing! Click the blue Save button!!!
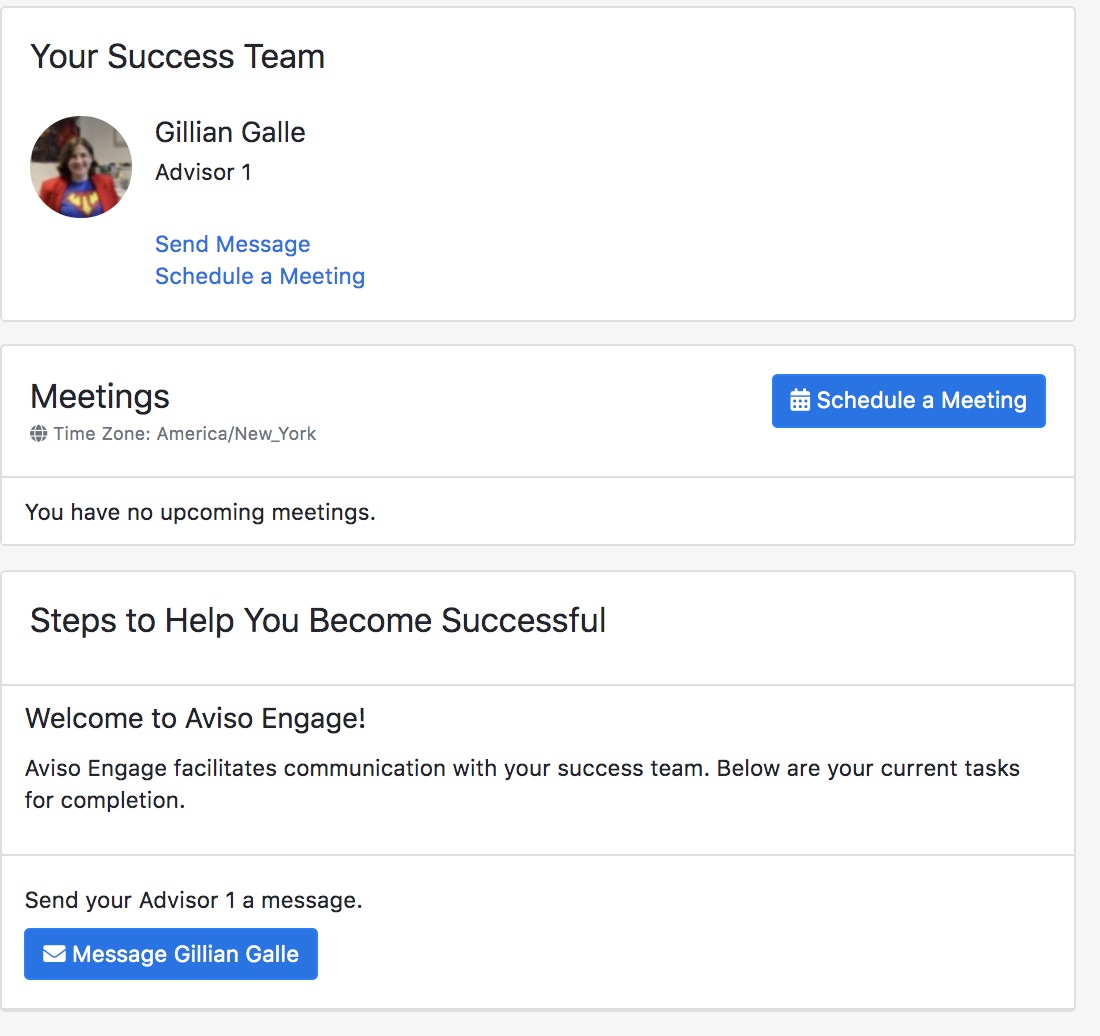
That’s it! Now, if a student wants to schedule a meeting with you, they can log into Aviso from the Portal and click on the link below the photo of you (their advisor) to “Schedule a Meeting”! They’ll then be presented with your known availability (within the constraints you set up above) and the ability to choose how they want to meet with you (phone call, Zoom meeting, or in your office).
Once they’ve scheduled the meeting, Aviso sends you an email letting you know about the requested meeting (and I’m relatively confident that it also adds it to your Outlook calendar as well).
**WARNING**: If a student chooses a Zoom meeting with you, you will still need to create the Zoom meeting and send the link to the student. The Zoom meeting is not automatically created.
Is it really that simple? Yes! Here’s literally what your advisee sees when they log in to Aviso:
If you want some sample instructions to send your advisees, I’d be happy to share what I’ve used with my students. Just send me an email!
Don’t feel like copying and pasting the same instructions into multiple emails? Go check out our article on How to Create a Message Template in Aviso.


